Drafting Notes
Resource: PNU- TLE
Drafting
Concept of Drafting
In most cases before making the final plan it takes the form of sketches and drawing
Sketches usually precede the making of scale drawing of an object.
An attempt to make something without having a definite plan usually results in waste of materials and time as well as in a poorly constructed project.
DRAFTING EQUIPMENT
In order to do planning or drafting work it is first necessary to learn the names of the tools the draftsman uses and the way he uses them to produce a good drawing. In addition it is necessary to learn certain rules and regulations which are the principles of good drafting.
Drawing Pencils
- Drawing pencils is made of a much better grade of graphite, commonly called lead, than the ordinary writing pencils so it is possible to draw lines which are of uniform blackness and to do better quality of line work.
- The hardest of the drawing pencils is the 9H. The next hardest in order are the 8H, 7h, 6H, 5H, 4H, 3H, 2H, H, HB, B, 2B, 3B, 4B, 5B, and 6B. The 6B is the softest of all the drawing pencils. It is used mainly by artists for sketching. Most work in engineering drawing is done with the 4H, 2H, and H pencils. Generally the 4H pencil is used for layout for construction lines, the 2H pencil for general line work, and the H pencil for lettering.
- To do good drawing it is necessary to work with a good sharp pencil point. This is why drawing pencils are used for our drawing rather than the regular writing pencils. The best kind of a pencil point for the beginner is the conical-shaped point. The graphite should be exposed about 3/8 of an inch, and the wood about one inch making a total of 1 3/8 inches. A pad of sand paper is useful in keeping pencil points sharp.
Cross-Ruled Paper
- Paper which has uniformly spaced lines running both vertically and horizontally is called cross-ruled papers.
- The lines are commonly spaced at 1/8 inch or 1⁄4 inch apart.
- The paper is used for preliminary drawings of objects, either freehand or mechanically.
- Each unit of space may be used to represent an inch, a foot or a fraction thereof, thus making it much easier to have the drawing in the proper scale or proportion.
- The ruled lines also help the sketcher to make lines straight either horizontally or vertically.
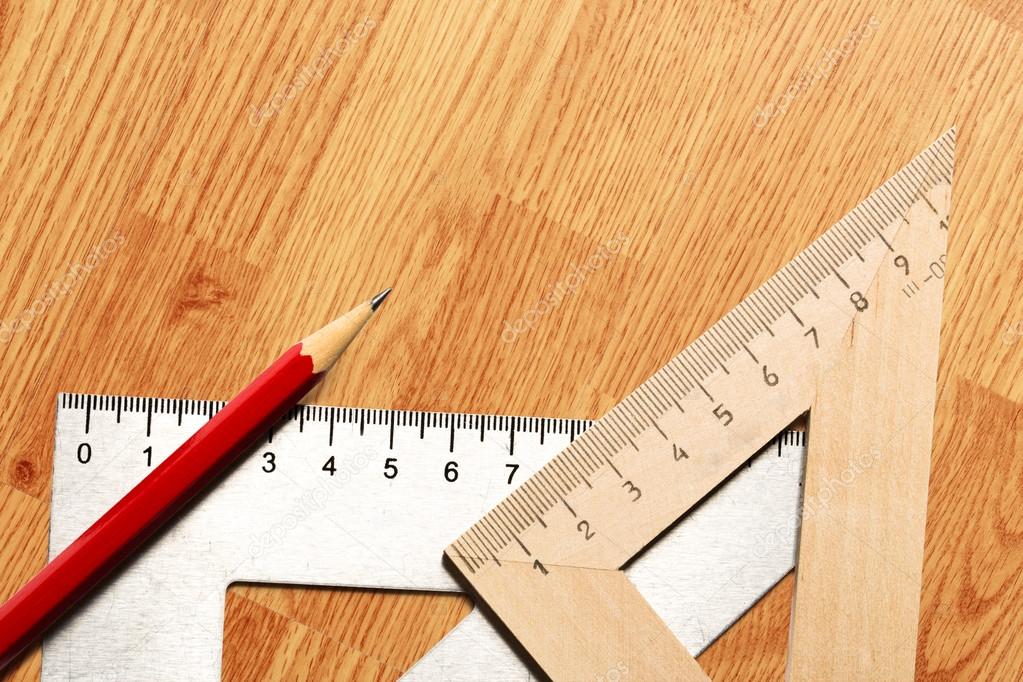
Rule
- A rule is necessary in order to make sketches of objects. For example, the designer or draftsman may be required to make a freehand sketch of a machine part.
- A rule is necessary to make the measurements from the part. These measurements must then be placed on the sketch as dimensions.
- The rule is not used to draw straight lines of a mechanical drawing.
- The rule should be graduated into sixteenths or preferably sixty fourths of an inch. Whenever it becomes necessary to have more accurate dimensions than 1/64 of an inch, a micrometer should be used. For small parts a 6‖ steel rule is suitable; for larger ones a 36‖ steel rule should be used. .
Erasers
- When an error happens when making a drawing like a line is drawn too long or in the wrong place, the correction is done by using an eraser.
- There are many kinds of erasers available but the draftsman doing only pencil work needs really just two kinds.
First he needs an art gum, which is used mainly for cleaning soiled drawings and tools and for erasing lines which are not very close to other lines. Along with the art gum, the draftsman should have a good rubber eraser with fairly sharp edges. The sharp edges enable the user to erase a line in a congested area of the drawing without erasing the adjoining lines.
- The eraser should have no coarse abrasive in it. An abrasive eraser is not needed on pencil work; also, it will ruin the surface of the drawing paper.
- A sharp knife or razor blade is sometimes used by draftsmen in scraping off incorrectly inked lines.
Drawing Board
- Smooth surfaced drawing boards are usually made of soft wood such as basswood or pine in which thumbtacks can readily be used.
- They are usually made with a cross strip on each end of the board to prevent warping and splitting.
- Large boards usually have cleats fastened to the back side of the board to serve the same purpose. The edges must be straight, smooth, and square to provide a working edge for the T square.
- Drawing boards come in various sizes such as 12‖ x 17‖, 16‖ x 21‖, and 20‖ x 24 1/2
- Special boards with a parallel rule attachment, which eliminates the need of a T square, may not be purchased.
- Drawing tables with a drawing board top which can be adjusted to various angles and heights may be obtained.
T Square
- The T square is used to draw all horizontal lines. It is also used for a guide in drawing inclined and vertical lines with the triangles.
- It is composed of two parts, the head and the blade. These parts are rigidly fastened together so that the working edge (or top edge) of the blade forms a right angle with the head.
- The better quality T squares have clear transparent edges which enable the draftsman to see lines through them.
- T squares are usually made in the following lengths: 15, 18, 21, 24, 30, 36, 42, 48, 54, and 60 inches.
- To keep T square in good serviceable condition it should receive gentle treatment to protect the edges of the blade from nicks.
- The joint between the head and the blade must be rigid so as to prevent play, which would result in inaccuracies in the drawings.
- The head of the T square should be used against the left edge of the drawing board, when the pupil is left handed; in that case it should be used against the right edge.
- It should be held firmly against the edge when in use so as to insure that all horizontal lines are parallel and that vertical lines are perpendicular to the horizontal lines.
Triangles
- There are two triangles the draftsman needs. They are a 45o triangle and a 30o– 60o triangle.
- The 45o triangle has two angles of 45o and one of 90o, while the 30o- 60o triangle has one angle of 30o one angle of 60o, and one angle of 90o.
- The better triangles are made of celluloid or plastic; the cheaper ones are made of wood. The advantages of celluloid triangles are that they do not chip or break as easily as the wooden ones and they are transparent, which enables the draftsman to see through them.
- An 8‖ 45o triangle and a 10‖ 30o - 60o triangle are good sizes to use for average work.
- To draw vertical lines with the triangle one edge is held along the upper edge of the T square so that the right angle of the triangle is adjacent to the edge of the T square and is in the lower left hand position. The pencil point is placed along the edge of the triangle down near the blade of the T square and then drawn away from the T square. Always rotate the pencil as the line is being drawn; this produces a line of uniform width.
- Lines making angles of 45, 30, 60, 15, and 75 degrees with the horizontal or the vertical may also be drawn with triangles. Triangles may be used as a straight edge in drawing a line through two given points. The T square may also be used for this purpose.
LETTERING
Lettering is usually done freehand. In general, there are two styles of lettering-engineering and architectural.
Either one of these two styles may be made vertically or inclined.
Complete instructions for making a machine part or for building a house cannot be recorded without a few notes to supplement the drawings. Also it is imperative that the dimensions be placed on the drawing so that the object may be made the correct size. In order that these notes and dimensions may be clearly and easily read they are lettered.
The ability to letter legibly and neatly is useful in other ways than in drafting. For example, lettered names and addresses are frequently required. Print! Don’t write! Is a common suggestion.
In order that the lettering will all be the same height, two light horizontal lines are drawn – one for the top of the letters and other for the bottom. These light lines are called guide lines because they serve as guides in making the letters all the same height.
When vertical lettering is used vertical guidelines should also be drawn to guide your hand in making the vertical strokes in the letters. Vertical guidelines are drawn lightly and are spaced at random, usually about 3⁄4 of an inch apart.
Horizontal guide lines should be carefully spaced. A special lettering device for lettering may be used, or spaces may be accurately measured with the scale. In every case they must be spaced uniformly and drawn very lightly with a very sharp pencil. It is not necessary to erase these lines if they are properly drawn.
A good height of lettering for dimension and notes on a working drawing is 1/8 of an inch. For the lettering of subtitles 3/16 of an inch is recommended. Many other heights of lettering are often desirable.
Most drafting rooms today use upper case (meaning letters are taken from the old-time printer‘s upper case where the capitals were kept) or capital letters for nearly all lettering. A few offices use both upper case and lowercase (small) letters.
When lower case letters are used, capitals are used in the beginning letter at the start of a sentence, for proper names, and for the beginning letter in the series of words which do not make a complete sentence.
All titles should be lettered with capital letters. When only capital letters are used, the beginning letter of each sentence is often made higher than the remaining letters.
When using lower case letters, at least three horizontal guide lines and sometimes four are used. One is drawn for the top of the tall letters such as b, d, f, and h. Another line is drawn for the top of the body of the letters and other and another for the bottom of the body of the letters. Sometimes a final line is drawn for letters which extend below the others such as g, j, p, q, and y.
When using two heights of capital letters only three guide lines are used- one for the top of the taller letters, a second one for the top of the shorter letters, and one for the bottom of all letters. All guide lines should be drawn with a very sharp hard pencil.
Composition in Lettering
Composition is the spacing of the letters to form words, the spacing of words to form sentences, and the spacing of sentences to form paragraphs.
In order to get good spacing of letters in forming words, the areas between the letters should be approximately equal. This does not mean the horizontal distances are equal. The space between two words in the same sentence should be equal to the height of the line of letters; that is, the body of the lower case letters or the height of the capitals, when only capitals are being used.
Certain combinations of letters such as the L and T may be overlapped slightly when they appear in this order.
The space between sentences should be about twice as great as the space between words. This makes the lettering easier to read.
Sometimes it becomes necessary to fit lines of lettering into a limited space. In order that all of the letters will fit, it is necessary to condense the letters. These condensed letters are the regular ones except that the horizontal distances have all been decreased in the same ratio. Also the space between letters is decreased uniformly.
When a few words are to be put in a wide space, letters may be extended. Condensed and extended lettering are very useful in lettering titles on drawings or maps.
LINE TECHNIQUES
Drawing can provide a very definite description of an object. The lines are drawn according to certain standards already recognized by draftsmen and the people who read drawings.
Certain types of lines are used for object lines, others are used for center lines, and still others for dimension lines. In making a pencil drawing there are different line widths or weights. Commonly used are the wide or medium line and the narrow or light line.
In ink work three line widths, heavy, medium, and light, are used.
Kinds of lines
Outline of parts. It is used to represent the visible edges of an object when making a drawing. When done in pencil it uses medium line; when done in ink, it uses heavy line.
Section line. It is used to indicate the sectional views.
Hidden line is a dashed line. It is a medium weight line used to represent edges of an object which are hidden from the view. The dashes are about 1/8‖ long and the spaces are about 1/16‖ long. It is very important that they be kept uniform in length.
Center line. Is a light line made up of a series of long and short dashes. The long dashes are from 3⁄4‖ to 1 1/2 long and short dashes are about 1/8‖ long. The spaces between the dashes are 1/16‖. Here again the spaces and dashes must be uniform in length. Center lines are used to indicate the centers of holes or the center of symmetrical objects.
Dimension lines. Light solid lines except where they are broken for placing the dimensions. These lines are used to indicate that the dimension is measured in the direction of the line and the points of the arrows at each end show the dimensioned distance. This same width of line is used for extension lines.
Cutting plane lines. Heavy lines made up of a series of one long dash about 3⁄4‖ long and then two short dashes each about 1/8‖ long Cutting plane lines are used to indicate the position of the cutting plane when making a section.
Short break lines. Heavy wavy lines. They are made freehand and indicate that the portion of the object has not been shown on the drawing. This line is used where the break is short.
Long break lines. Light lines with a short freehand portion inserted about every 3⁄4 of an inch. These lines are used to show that a part of the object is not shown on the drawing. This line is used where the break is long.
Alternate position or adjacent parts lines. Lines which are made up of a medium weight line composed of a series of dashes about 1/32‖ long. Sometimes parts of machines which move from one position to another have to be shown on a drawing in one position, and then shown in the alternate position.
Ditto lines. Used to indicate identical parts after a few have been drawn in detail. These lines are medium weight and are composed of short dashes grouped in pairs.
Construction lines. Are not shown in the alphabet of lines because they are lines which never appear on the finished. They are for the use of draftsman only. The same is true of guide lines for lettering, since they are for the purpose of aiding the draftsman in making a neater job of lettering.
Parallel lines. Are lines that never meet no matter how far they are extended.
Methods of Drawing Lines
In general, drawings are made up of straight lines and curved lines. The straight lines fall into three groups, horizontal lines, vertical lines, and inclines lines.
Curved lines may be an arc, a complete circle, or one of the other curves of the conic section or just an irregular curve.
A horizontal line is drawn along the top edge of the T square. It is drawn from left to right. Vertical lines are drawn along the vertical edge of the triangle. Vertical lines are drawn away from the draftsman. Inclined lines are drawn in the most convenient direction. Angles of 15°, 30°, 45°, 60°, or 75° with the horizontal or vertical may also be drawn with the triangles and T square.
To draw any straight line, place the pencil along the edge of the T square or triangle so that the pencil lies in a plane which is at right angles to the surface of the paper and inclines in the direction in which the line is being drawn. The pencil should be inclined about 60°. While drawing the line the pencil should be rotated slightly so that the point wears uniformly and produces a line of uniform width.
PICTORIAL DRAWINGS
To express an idea clearly a drawing is made which is understandable by those who will see it. There are several kinds of drawings which may be grouped into two general classes – pictorial drawings, and working drawings.
Under the general heading of pictorial drawings are isometric, oblique, and perspective drawings.
The word ―pictorial‖ comes from the word picture; therefore, a pictorial drawing resembles a picture. As a matter of fact, a photograph taken with a regular camera represents a true perspective, which is one type of pictorial drawing.
In engineering work an isometric type of drawing is quickly made and easily read, but the appearance of the object is somewhat distorted. It shows three sides of the object. Oblique drawings are also frequently used in engineering. They also show three sides of the object and may be used to show the front in true shape.
Isometric Drawings
In isometric drawings, all the principal edges of the object except the vertical edge are drawn at 30 degrees to the horizontal. The bottom and top edges, which would normally be horizontal, are drawn 30 degrees with the horizontal.
All edges are measured their true distance in isometric drawing. Isometric drawings are used to show the front, top, and side of an object in their actual relation to each other.
Some objects have inclined surfaces or edges. To show an inclined edge of an object in isometric drawing it is necessary to locate carefully each end of the line by making measurements from the respective vertical and horizontal edges and then draw the line between these two points. This type of line is called a non-isometric line.
A disadvantage in isometric drawing is that any surface of the object having a circular hole, or circular shape presents a problem in drawing. However, circles or arcs may be drawn in isometric.
Oblique Drawings
Another commonly used type of pictorial drawing is the oblique. The oblique differs from the isometric in that only two faces are drawn at an angle. The receding faces-top and right and left sides-may be drawn at any angle. Most commonly used, however, is 45 degrees.
Perspective Drawings
Another type of pictorial drawing is perspective. This used more by artists and architects than by engineers. It, however, more nearly resembles the way objects actually appear to the observer than does either isometric or oblique.
One-point and two-point perspective are the more commonly used kinds. In one-point perspective all horizontal lines point toward the one vanishing point, which is located on the horizon.
In two-point perspective the horizontal lines running in one direction lead to one vanishing point and the horizontal lines running in the other direction lead to a second vanishing point. Both vanishing points are located on the horizon line.
The vanishing points are chosen so that the faces of the objects are made long or short depending upon whether you wish to show more of one face or the other.
ORTHOGRAPHIC PROJECTION
The working drawing provides the mechanic with the information about the size and shape which is necessary for the construction of the object.
Working drawing may contain two, three, or more views. Three views are adequate for giving the construction information for a majority of projects and two views are adequate for some.
The draftsman must learn to arrange his work neatly and in a well balanced manner. It is necessary for the draftsman to show the tie rack so that all points are in their true relationship and all dimensions are shown as they actually are. This enables any person who can read working drawings to understand the size and shape of the tie rack.
It is necessary to draw the tie rack in three views in order to show how it looks from side, top, and end. When objects are drawn in several views, all dimensions can be shown clearly.
Since each view can show only two dimensions, the third dimension has to be obtained from one of the other views. With the three views it is easy to show entire dimension and to indicate the depth and placement of the thirteen holes for the dowels. Also, it is easy to show details of the chamber.
The auxiliary views are drawn to describe the block ore completely. It is usually not necessary to draw more than one or two auxiliary views.
Two views are adequate to completely describe a plane cylinder or a cone and one view is adequate to describe a sphere.
Dimensioning Drawings
All working drawings must be clearly dimensioned so that the workman can construct the various parts to the correct size. Dimension figures should be about 1/8‖ high, and fractions should be 1⁄4 ―high.
The dimension lines are fine, full lines which contrast with the outline of the object and contact extension lines with long, slim arrowheads. Extension lines do not contact the outline of the object but begin 1/16‖ from the object outline and extend about 1/8‖ beyond the dimension lines.
Dimensions should be placed between views and not on the face of the view. The smaller dimensions are placed nearest the view. The symbol is used for inches and for feet. Feet and inches are indicated as 9‘-3‖. Feet and no inches are indicated as 9‘-0‖.
The dimensions of the circles are shown by the diameter and arcs by the radius.
GEOMETRIC CONSTRUCTION
Knowledge of simple geometric construction is essential to the draftsman or engineer and is useful to the layman in reading drawings, making plans, and developing sketches of the objects to be made.
Kinds of Angles
An obtuse angle is one which is greater than 90° and less than 180°.
Acute angle is one which is less than 90°.
Kinds of Triangle
Equilateral triangle has all three sides and angles equal.
Obtuse triangle has one angle greater than 90°.
Scalene triangle has no two sides equal.
Drawing Tangents
Tangent lines are frequently used by the draftsman. A straight line is tangent to a circle when it touches it at only one to a point, and the radius of the circle drawn to the point of tangency is perpendicular to the tangent.
Constructing a Regular Hexagon
Hexagons are six-sided figures which are frequently used in machine drawing for showing hexagonal heads of bolts and screws.
Regular hexagons have six equal sides and six equal angles.
A vertical line and two 30 degrees line are drawn through the center of the circle. This divides the circumference of the circle into six equal parts, When the points, the circumference of the circle are connected the hexagon is formed.
Ellipses
Ellipses are necessary in drafting when oval shapes are required. The pin and string method is often used in laying out an ellipse.
GRAPHS, CHARTS, AND MAPS
Graphs and charts are widely used to show in an objective manner the relationship of different numbers, sizes of object, speeds, and surface areas.
The ability to read charts intelligently and to make simple graphs and charts to illustrate your ideas is an important part of general education. Graphs and charts provide an effective method of portraying ideas quickly and interestingly.
Lines graphs, bar graphs, area graphs, volume graphs, pictorial graphs, and organizational charts are common devices for portraying ideas graphically.
Line Graphs
Line graph is usually constructed by placing two sets of figures in relation to each other on axes formed by two lines perpendicular to each other which intersect at a point.
Horizontal line is the abscissa or the X axis. The zero point is called the origin.
Bar Graphs
Bar graphs are excellent for comparing quantities, values, and percentages. The height of each bar represents different percentage or quantity.
Bar graphs are most effective when only a small number of bars are used. The bars should all be spaced equidistant.
Area Graphs
Pie chart is useful in making percentage comparisons. It is easily used, easy to make, and easy to read.
The circumference of the circle is 360°, and it is common practice to think of the circumference of the circle as being divided into 100 equal parts.
Each part is equal to 3.6° on the circumference. The sum of all divisions of a circle or pie chart should be equal to the circumference.
The percentage divisions of the circumference are connected with the center of the circle, and the segments are cross hatched and labeled.
Volume Graphs
Volume graph is suitable when only two or three items are to be compared. The third dimension shown makes this type of graph particularly useful in comparing volumes.
Pictorial graphs
Pictorial comparisons can be made effectively by using geometric or pictorial symbols
Like the volume graph, pictorial graphs often give the impression of the third dimension and are useful in comparing volumes.
Organizational Graphs
Organizational graphs are useful in showing the relationships and functions of different departments of an industry, a school system, or a government organization.
The organizational graph enables the reader to grasp the whole organizational framework at a glance.
Maps
The ability to read maps enable one to find directions easily and, improve means of transportation.
The common types of maps are geographic, topographic, relief and contour.
The geographic map shows the boundaries of countries, important town, cities, mountain ranges, main roads, rivers and lakes.
The topographic map is used to show in some detail the top view of a section of a country
A relief map shows the relative elevations of the ground surfaces.
Contour map are made when contour arte given with elevation.


Comments
Post a Comment